Baby wraps are a great way to keep your baby close while keeping your hands free so you can get things done. Even if you don’t want to buy one at the store, it’s easy to learn how to make a baby wrap. All you need is a long length of fabric – you can even use a blanket, sheet, or scarf if you have one big enough. Below, we’ll take a look at how to make a baby wrap. You’ll find instructions on how to make a traditional wrap, a ring sling, and a baby K’Tan with both sewing and no-sew methods.
How to Make a Baby Wrap
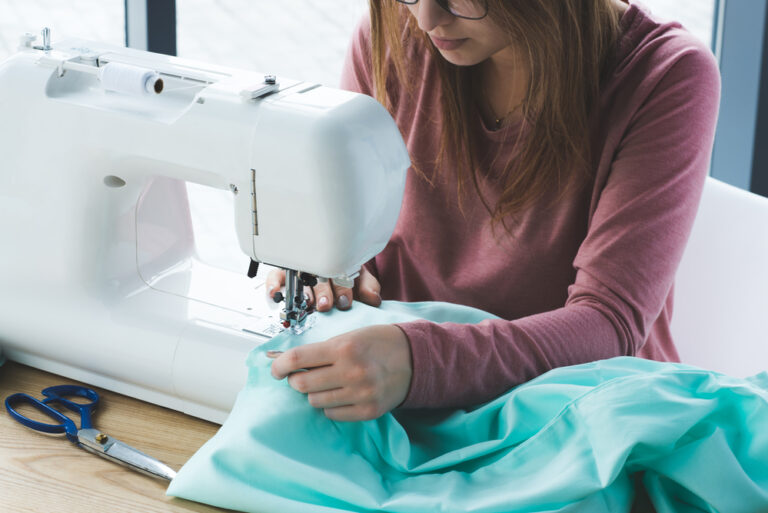
For the simplest baby wrap, you only need a length of fabric, a tape measure, and scissors sharp enough to cut the fabric without fraying it too much. The supplies mentioned are for a no-sew baby wrap. If you want a neater look, then you’ll also need a sewing needle and thread or a [easyazon_link identifier=”B09227G1WD” locale=”US” tag=”experiencedmommy-20″]sewing machine[/easyazon_link] to create hems.
How to Size Your Baby Wrap
The sizing of the baby wrap depends on the style. If you are making a stretch wrap, then the average length is around six yards of material. However, it’s okay to make it a little larger or smaller depending on your preference. Some people also leave the wrap longer than they need if they plan to share with their partner, a grandparent, or anyone else.
Woven wraps aren’t as stretchy, so they usually come in specific sizes. The average adult needs a size 4-7, which is anywhere from 4 to 5 1/2 yards in length. However, woven wraps can be made with anywhere from 3 to 7 1/2 yards of material. You can make the tail longer or shorter, depending on your preference.
Laying Out the Length of Your Baby Wrap
Once you have all your supplies gathered, cut the fabric. While the length varies, you can also go with an average of 5 yards. The fabric should be about 28″ wide.
If you want tapered ends, you’ll need to cut the ends at a slant. Some people find they make the wrap easier to secure. However, a tapered design isn’t necessary so it depends on your preference. If you choose to taper the ends, choose a point to start tapering at. Then, cut a diagonal line on a steep incline to the end of the wrap.
Hemming the Ends (Optional)
Once you have the wrap cut to your preferred size, you can hem the ends. Iron the fabric so it’s completely flat and hem the edges. An easy way to do this without a sewing machine is folding the edge over twice, then sewing a simple seam around the edge.
Adjusting the Size
Once you’ve finished the baby wrap, try it on and see how it fits. You can make it shorter if necessary – just cut the fabric where you need to and hem the ends again if you did the first time.
RELATED: How to Use a Baby Wrap
How to Make a Baby Wrap Out of a Sheet
In a pinch, you can even make a baby wrap out of a top sheet without any hemming or sewing. All you have to do is fold the sheet in half lengthwise. It should be long and narrow.
Then, lay the sheet over the shoulder on the side of your most dominant hand. The fold should open toward the outside of your body, rather than the middle. Keep the front part of the sheet at waist level and let the rest of the length hang over your back.
Next, you’re going to tie a slip knot in the sheet. Grab the material that is draped over your back and pull it toward the underside of your other arm. You want to pull it tight so that there isn’t a lot of movement in the piece wrapped around your back. As you fold, it might be easiest to use your elbow to “pinch” the fabric and hold it in place.
Then, bring this piece of fabric under your arm up and across your chest, laying it over top the part of the sheet that’s draped over the shoulder of your dominant hand. Take the longer piece and pull it through to create a loop of sorts. You should tighten it so that it’s taut but comfortable across your chest.
The next step is taking the ends of the sheet and pulling them so they make an “X” shape. The longer side should be over the shorter side. Bring the long end up and it should make a slip knot. You can easily adjust the slip knot by sliding it up and down while you pull the long side tight.
Positioning Your Baby in the Sling
Once you’re ready to put the baby in the sling, start by positioning the knot so it’s toward your chest. It shouldn’t be near your back or the top of your shoulder.
Put your baby in the sling by pulling out the fabric in the pouch that you made. You should use the carrying position most appropriate for your baby’s age. You’ll be using the positions recommended for a ring sling, including cradle hold for newborns and babies without neck control, Buddha (outward facing) best for babies 3-6 months, back carry for babies 6 months to 2 years, and hip carry for babies 6 months to 2 years.
Once your baby is in the pouch, fan out the fabric near the shoulder so it covers a wider area. This will put less strain on your back and shoulder by distributing the weight more evenly. Use the knot to tighten or loosen the carrier and get your baby closer so you are both comfortable.
Be sure when you position your baby that you can see their airway and that their neck is supported. You don’t want them leaning forward and closing off their airway while they are sleeping.
How to Make a Ring Sling
Another style of baby carrier is the ring sling. The best thing to do is buy [easyazon_link identifier=”B07T9634J5″ locale=”US” tag=”experiencedmommy-20″]rings[/easyazon_link] made especially for ring slings. These are made of durable materials that will support your baby’s weight. Since most rings are made from metal materials, be sure to choose something that won’t get rusted or wear down easily.
Something to note is that slings are not recommended for long periods of time. They allow your baby’s legs to stay close together, which hinders proper hip development. So, if you do have a ring sling, you won’t want to use it as often as you could use a more traditional baby wrap.
Materials You Need
To make a ring sling, you’ll need a length of fabric (2.25 yards is the standard length) and two rings designed for baby carrying. You’ll also need a sewing machine, an iron, measuring tape, thread, and pins. Alternatively, you can sew this by hand instead of using a sewing machine.
Instructions for Making a Ring Sling
If your fabric is too wide, you’ll want to cut it so that it is 2.25 yards long and 28 inches wide. Lay the fabric so the design (the part you want on the outside) is facing down. Take the long side and fold it at about 1/4-inch. Then, iron the fold so it creases and folds in one more time. Iron it again and use pins to hold it in place until you’re ready to sew.
Next, repeat this step on the three other sides of the sling. Once they are all pinned, sew both long sides and one of the shorter ones. You’ll leave one of the shorter sides open.
Ideally, do a backstitch at the beginning and end of the threading. This makes it less likely for the threading to come apart.
Once you’re finished, measure 15 inches down from the open side of the sling and mark it with a pin. Take the two rings and run the fabric through them, starting at the unsewn side. Then, you’re going to take the hem of that side and sew it at the 15-inch mark so that the rings are secured. You’ll want to repeat this a second and third time, first at 1/2-inch from the hem you just made and then at 1-inch from the hem. This leaves you with three separate hems supporting your child, so you know they’re secure.
RELATED: The Best Baby Carrier for Petite Moms
How to Make a No-Sew Baby K’Tan
Another style of baby wrap is similar to the [easyazon_link identifier=”B001NILB9W” locale=”US” tag=”experiencedmommy-20″]Baby K’Tan[/easyazon_link]. You’ll need to gather two T-shirts without side seams and a third item for the middle of the K’Tan. A third shirt or scarf will work well.
Start by cutting all the shirts that you are using. Start at the bottom of the armpits and cut straight across. This creates a piece of fabric that resembles something like a tube top. If you chose a shirt as your third item, you’ll want to cut it across at the armpits and then cut it open, so it’s one long piece of fabric.
To wear the baby K’Tan, stretch one piece of fabric starting at your shoulder and under your arm on the other side. Then, put the second piece of fabric on the other shoulder, stretching down under your arm on the opposite side. It should make an “X” shape across your chest.
You’re going to put your baby in the carrier by putting them in between the two pieces of fabric. The pieces on your chest should go across your baby’s back and their legs should sit on either side of your waist. You should position your baby high up on your chest and their airway shouldn’t be obstructed.
Once your baby is in place, take the final piece of fabric and wrap it around your baby’s back before tying it behind you. You’ll want to be sure that it is across the back of their head and neck, providing necessary support in the earlier months.
RELATED: The 17 Best Baby Carriers for Breastfeeding
FAQs – How to Make a Baby Wrap
What is the best fabric for a baby wrap?
For a stretch wrap, the most common material is cotton. Cotton is a light, breathable material so it doesn’t get too hot. It also doesn’t stretch too much, which keeps your baby close to your body and stops the material from sagging. A cotton/spandex blend is also a common material choice, since it’s slightly stretchy and may not shrink as much in the laundry.
Some wraps can also be made from woven materials. They are available in a wide range of materials, including bamboo, cotton, silk, cashmere, and wool. As you consider materials, some factors you’ll want to keep in mind are the breathability/warmth (which may change with the season), how stretchy the material is, and if it will shrink in the laundry.
Is a homemade baby wrap safe?
Yes, a homemade baby sling is safe. There are several safety steps you can take to ensure your baby is safe, including:
Keep the wrap snug. While it shouldn’t be over-tightened, you also don’t want the carrier too loose. A loose carrier has the risk of unwanted baby movement. Additionally, it strains certain muscles and makes carrying your baby more tiring.
Be sure baby is sitting properly. You want him or her sitting high enough up on your chest that you’d easily be able to kiss them. The carrier should also keep your baby upright, without any slouching in the chin or chest. Their back and bottom should be well supported and their knees should be bent and folded above your baby’s waist in an “M” shape. Having your baby properly supported is
Make sure you can see your baby’s face. This is especially important in sling carriers, since it might restrict your baby’s airway if they turn in toward your chest. It’s also easier for you to understand what your baby needs when they’re facing you.
Make sure it isn’t too hot or too cold in the carrier. Be sure there is plenty of ventilation, especially in the summertime since you’ll be sharing body heat with your baby. You’ll also want to be sure that the carrier offers enough warmth in the winter, especially since the carrier won’t properly support your baby if they are wearing a bulky jacket.
Know when you can use your baby carrier. If you need to use a safety device like a seat belt, then you probably shouldn’t do that with a baby carrier.
Squat when picking things up if your baby is in the carrier. If you absolutely have to bend forward, be sure to put one hand behind your baby’s head and neck so you can support them when you bend down. This stops them from falling out of the baby carrier.
Check your carrier regularly for any wear and tear. Like all things, the fabric that makes up baby carriers breaks down over time. If you notice frayed pieces, holes, broken buckles, excessive stretchiness, or other issues, don’t use the carrier.
Is it cheaper to make your own baby wrap?
The best baby carrier wrap usually costs anywhere from $20 to $45+. Your biggest cost when making your own baby wrap is the fabric. Therefore, it depends on the price of fabric per foot. In some cases, you may even be able to use fabric that you already have on hand, wait until it goes on sale, or use a coupon. One place that’s well known for its coupons you can use on fabrics is JoAnn Fabrics (and they are usually 20% off).
If you can find material on sale, it becomes very affordable to make your own baby wrap. Different materials are great for different seasons – you can use a warmer one in the summer and more breathable material in the winter. Having more than one wrap also makes it easy to have different sizes for other people or different colors to match your baby’s outfits. You also won’t have to worry about waiting for wraps to get clean when they need to be washed.
Final Word
Knowing how to make a baby wrap at home can really come in handy. Whether you’re interested in making a DIY sling with cute fabrics or need something that works in a pinch (like a bedsheet), hopefully, this article has helped you learn how to make your own baby carrier. Happy crafting!