Teaching children how to read has begun with letter recognition for a very long time. Even America’s very first schoolbook, The Protestant Tutor, taught letter recognition before it ever taught reading. America’s first reading book, New England Primer, did the same.
Today, we understand how well a student knows their letters is a strong predictor as to how well they’ll be able to read. But how do you teach letter recognition?
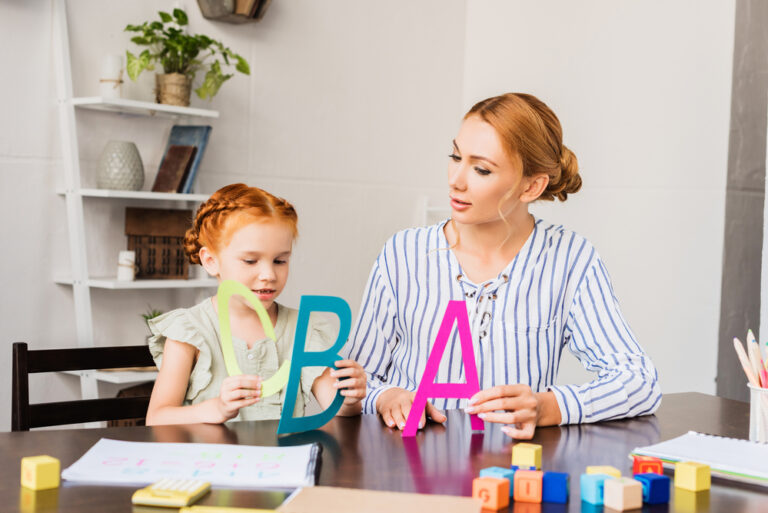
How to Teach Letter Recognition
Letter recognition is the first step in learning how to read. Without being able to recognize the letters, children struggle to learn the sounds that the letters make, and, thus, they struggle to recognize the resulting words.
The following activities focus on all four components of letter recognition.
1. Sensory ABCs
What you’ll need:
- Mini Foam ABC
- Vinegar
- 4 Cups of Rice
- 4 Colors of Food Coloring
- 1 Tote
- 4 Ziplocks
Instructions:
Before the Activity:
Mix 1 cup of rice with 2 drops of vinegar and the red food coloring in a ziplock. Mix well. Spread on a cookie sheet to dry.
Do the same for green, blue, and yellow (1 cup of rice for each).
Your children will have fun helping you with this activity if you want to include them.
After each rice mixture is dry, mix all four rice mixtures together.
Remove the letters from the foam pieces and lay them on the bottom of the tote. Cover the letters with the colored rice. Let your child dig for the letters one-by-one. Have him tell you what the letter is, what sound it makes, and where it goes. Have him put it in its hole.
2. Hole Punch Letter Matching
There are free printables online for matching upper and lowercase letters. One such printable allows your child to use a hole punch (what child doesn’t LOVE to use a hole punch?) to punch holes over each lower case letter whose uppercase letter is on the lefthand side of the paper. Sound like fun? Try it out!
3. Go on a Letter Sound Hunt!
Show your child a letter flashcard. Your child must tell you which sound that letter makes. Then, you can give him a time limit to bring you as many things as he can that begin with that letter! My kids always had a blast with this one. By the way, this works for learning colors as well.
4. Letter Dice
Using a square wooden block or after making a cube out of paper, write letters on the six sides of the cube that your child has learned and is learning. Then, the two of you can take turns rolling the die and calling out either the name of the letter or the sound it makes, or you can draw it on a dry erase board or paper. You can also make the game more fun by using your body to form the letters or acting out the sounds they make.
5. Letter Sounds Race
“Hide” alphabet refrigerator magnets around the room “in plain sight.” Have your child stand beside the magnetic board. Call out a letter or letter sound. Say, “Go.” Let him run and find the letter and place it on the board. If he has a friend to race against, all the better. Otherwise, a timer works well.
To change things up, write the uppercase letters on the board, and hide the lowercase letters. Have your child put the letters on top of the corresponding letters when he finds them. You can do the same with lowercase letters.
6. Letter Sorting
Draw two large squares beside each other on the magnetic dry erase board. Above the squares, write “Holes?” Above one square, write, “Yes.” Above the other, write, “No.” Now, let your child sort their letters by the ones that have holes and the ones that do not. There is one catch, however. He must name the letter and tell you its sound before he can put it where it belongs.
7. Sandpaper Letters
Create letters out of sandpaper and glue them onto a poster board for your child to trace with his finger. This provides a tactile activity.
8. Alphabet Bingo
This is pretty easy. Your child looks for the letter you call out. The game progresses according to the traditional rules of Bingo. You can play it by calling out the letter name or the sound. You can also have your child call out the letters.
9. Alphabet Soup
Place felt or paper letters into a bowel. Take turns with your child scooping letters out one-by-one. You can call out the letter’s name or sound depending on what your child is learning at the time.
10. Memory Game
Place three to five magnetic letters on a tray. Cover them with a towel. Remove a letter. Take the towel off and let your child guess which letter was removed. Let him find the letter among his own letters. Then have him draw the letter. You can also cover the letters and have him remember what all three letters were to make the game more difficult.
11. Stamp the Letter
Let your child watch you write the letter he is learning. Have him use a stamp to stamp along the line, effectively stamping the outline of the letter. All the while, have him say the letter’s name and the sound it makes. For instance, “A says a, a, a.”
12. Playdough Letters
Give your child a printout or drawing of the letter he is working on. Let him use his playdough to recreate the letter, laying the playdough on top of the paper.
13. Flying into Letter Recognition
Using masking tape, “write” the letters that your child is learning on the floor. Dictate a point where your child should stand. Let your child throw a paper airplane toward the letters. He must tell you the name and sound of whichever letter his airplane lands on. The goal is to land on every letter before his competition does.
14. Popsicle Sticks and Pipecleaner Letters
Provide your child with colored popsicle sticks and several pipe cleaners bent into circles and semicircles. Show him a letter and ask him to recreate it using his popsicle sticks and pipe cleaners. To make it more difficult, call out letters for him to create without showing him the letter beforehand.
15. Letter Excavating
Place the magnetic letters representing the letters your child is learning inside a metal cookie sheet. Make sure they are stuck well. Cover them with flour. Let your child use a powder brush or paintbrush to remove the flour from the letters one by one. Have him tell you the letter’s name and sound once he finds it. He can also keep track of which letters he finds by writing them down.
16. Clothespin Match
Write each letter your child knows and is learning on a clothespin with a permanent marker and on a separate piece of paper (each letter on their own piece). Mix up the clothespins and papers. Let your child find the matching letters and pin the clothespin to the piece of paper with the matching letter on it.
17. Foam Letter Match
Set alphabet cards out on the floor in alphabetical order. Let your child find the foam letters that go with each card and put them on top of the correct alphabet card. Have him tell you the letter’s sound and name as he places the foam letters on top of the alphabet cards.
18. Letter Sensory Bin
Fill a washing bin a quarter of the way full of dry beans. Mix objects into the beans that represent the letter your child is learning. These things might be magnetic letters, foam letters, toys that begin with that sound, or more! Just have fun.
19. Pompom Letters
Draw or print off a paper with the letter or letters your child is learning in it. Let place pompoms on the letters to “build” them.
20. Stacking Letter Tiles
See how tall you can get the tower of letter tiles. The catch? You and your child must name each letter before it is added to the tower!
There is a lot that goes into teaching a preschooler to recognize their letters. First, you must teach them the four components of letter recognition. Then, you must make sure to appeal to every side of their brain as you teach. I’ll help you out in each of these aspects today and end with a few methods for teaching letter recognition to your preschooler or kindergartner.
The Four Components of Letter Recognition
There is more to learning letters than merely seeing them again and again on a flashcard. A child may see something dozens of times and never retain the information. Likewise, a preschooler may be able to write their name but not be able to tell you the name of each letter when shown each letter individually.
Your child must learn each component of letter recognition to truly be ready for reading.
1. Your Child Must Be Able to Recognize the Letter
This pretty much goes without saying. Your child must know the shape of both the uppercase and lowercase forms of each letter. This means that he will be able to point out the letter when you call out its name.
Remember not to overwhelm your preschooler with learning too many letters at once. Many preschool curriculums teach one letter a week. As they learn that one letter, they also learn one color, one shape, and one number.
2. Your Child Must Be Able to Name the Letter
The next step is that your child will be able to tell you what the name of that letter is when you point it out. You might spend some time “playing parrot” or singing silly songs about the letter to help your child remember the letter’s name.
3. Your Child Must Know the Sound the Letter Makes
Next, your child must learn that, just as each animal makes a sound, each letter also makes a sound. An “A” sounds like an ant getting ready to sneeze. A “B” sounds like a boat trying to start, and so on. Learning letter sounds is another place that silly songs come in handy!
4. Your Child Must Learn to Write Their Letters
You might be thinking that this is beyond your preschooler’s abilities, but you’d be surprised at what a preschooler can do! Remember, there are fun ways to learn how to write your letters too. You can have your child draw in the sand or in shaving cream or have him glue macaroni noodles or yarn on a letter. Just have fun!
Check out the best books for 2-year-olds to give your child a headstart on the reading process.
How Does Your Child Learn?
Every person learns differently. There are four main different types of learners, and there are several combinations of those types making several other types. The types of learners are Kinesthetic Learners, Visual Learners, Auditory Learners, and Tactile Learners.
1. The Kinesthetic Learner
When a person is a kinesthetic learner, this means that they learn best by moving. To best appeal to a kinesthetic learner, teach him his letters by having him make the letter shapes with his body. Have him be the ant as he makes the a-a-a sound and the boat as he makes the b-b-b sound. Have him move!
2. The Visual Learner
The visual learner learns by seeing. They must see the letters and see something that represents the sound. They must watch you draw the letter and see your mouth as you say it. They learn by seeing.
3. The Auditory Learner
You’ve probably already gotten this one figured out. If the visual learner learns by seeing, the auditory learner learns by hearing. Talk your auditory learner through the formation of the letter, “Start on the top line. Travel down to the bottom line on a slant. Pick up your pencil and start at the top line again in the same spot that you started the first time. Go on a slant in the other direction. Stop at the bottom line. Give the ‘A’ a belt on the dotted line. Yay! You’ve made a capital ‘A’!”
4. The Tactile Learner
Tactile learning is hands-on learning. This is similar to kinesthetic learning, but it’s still in its own class. Tactile learners learn by doing with their hands. This is where all those arts and crafts and drawing in sand and shaving cream come in handy. Let your tactile learner build their letters with playdough or make their letter with M&Ms. The more they do, the better they learn.
Combine the Four for Best Results
No child is a cut-and-dried visual learner or a cut and dry tactile learner. Every person is a combination of two or more learning types. Therefore, even if you have a child who is predominantly one style or another, it’s best to combine your teaching styles. Appeal to every part of the brain.
Frequently Asked Questions
Am I qualified to teach my child?
Yes. The fact that you are mommy qualifies you to teach your child. In many states, you must have a high school diploma or GED to officially homeschool. However, you do not need to meet these qualifications to teach your child their letters, to preschool him, or to provide additional learning outside of school.
When should I teach my child his letters?
It’s never too early to teach a child his letters. Learning starts in the womb. However, toddlers are not ready for formal learning. Toddlers and preschoolers learn better through play. This is why each of the above activities is learning through play.
With my oldest, we played with the foam letters in the bathtub all the time. She knew all of her letters and the sounds they made and her colors by the time she was 27 months old. It is possible.
Which order should I teach the letters in?
You don’t want to teach letter recognition in just any old way. I am going to give you a specific order to teach the letters in. If children learn their letters in the following order, they can spell several words with the letters they are learning!
Letter Recognition Teaching Order:
- s, a, t, i, p, n
- c, k, e, h, r
- m, d, g, o
- l, f, b, q, u
- j, z, w
- v, y, x
How quickly should I introduce new letters?
If you’re teaching a toddler or preschooler, I’d recommend teaching one, maybe two letters a week. If you are starting with an older child, you can teach these letters more quickly.
The above letters are arranged into groups. Each group of these letters is introduced relatively quickly. The first group is introduced over the first week. You do several activities and games to learn those letters, then, once your child has mastered them, you add in group number two. Keep working on both groups, but focus on group two. You then build upon what they have learned, growing their list steadily. Just remember to keep at it and to just keep having fun!
Conclusion
The greatest thing about teaching small children is that it’s all about having fun! They don’t care what you’re teaching. Half the time, they don’t even care that they’re learning. Stink! Half the time, they don’t even know that they’re learning! They just know that they’re having fun with Mommy, and that’s what counts to them.
So, don’t fret about doing it right. Don’t worry about getting “the right amount of learning” in. Just have fun and the learning will happen!